Okay, so I’ve been obsessed with Nutter Butters since I was like seven years old. Those crunchy peanut-shaped cookies with the creamy peanut butter filling? Chef’s kiss. But here’s the thing… have you looked at the ingredient list on those packages lately? It’s, um, kind of terrifying. Plus they’re not exactly cheap when you’re trying to feed a household that goes through them like water.
So last month—I think it was a Wednesday? Maybe Thursday?—I decided I was gonna figure out how to make Homemade Copycat Nutter Butters. How hard could it be, right?
Spoiler alert: I failed. Twice. The first batch came out looking like sad, flat pancakes. The second batch? Let’s just say my smoke alarm has trust issues now.
But version three? PERFECT. And I’m gonna share exactly how I finally nailed it.
Table of Contents
Why Make Homemade Copycat Nutter Butters?
Look, I’m gonna be honest with you. Making these from scratch takes more time than walking to the pantry and grabbing a package. But the taste? Completely different level. Plus, you actually know what’s going into them, which makes me feel slightly better about eating six in one sitting. (Don’t judge me.)
My neighbor Karen—you know, the one who brings over zucchini bread every fall—she tried these and literally asked if I’d bought some fancy organic version from Whole Foods. I was SO proud. Like, embarrassingly proud. I may have done a little dance in my kitchen.
And another thing… if you’ve got kids with allergies or dietary restrictions, making Homemade Copycat Nutter Butters at home means you can control everything. My friend’s daughter can’t have certain preservatives, and she’s been making these weekly now.
The Secret to Perfect Nutter Butter Cookies
Here’s what I learned after my kitchen disasters: the texture is EVERYTHING. Store-bought Nutter Butters have that specific crunch that’s not too hard but definitely not soft. Getting that right was… a journey.
The key is—oh wait, I forgot to mention—you need to not overmix the dough. I know, I know, everyone says that about every recipe. But seriously. When I overmixed my first batch, they spread out flat and came out chewy instead of crunchy. Disaster. Complete disaster.
Also? The peanut butter you use matters more than I expected. I tried it with natural peanut butter (the kind where the oil separates on top), and it just didn’t work. Too oily. Stick with regular Jif or Skippy. Trust me on this one.
Ingredients for Homemade Copycat Nutter Butters
Okay, so here’s what you need. And before you ask—yes, I’ve tried substitutions. Some work, some don’t.
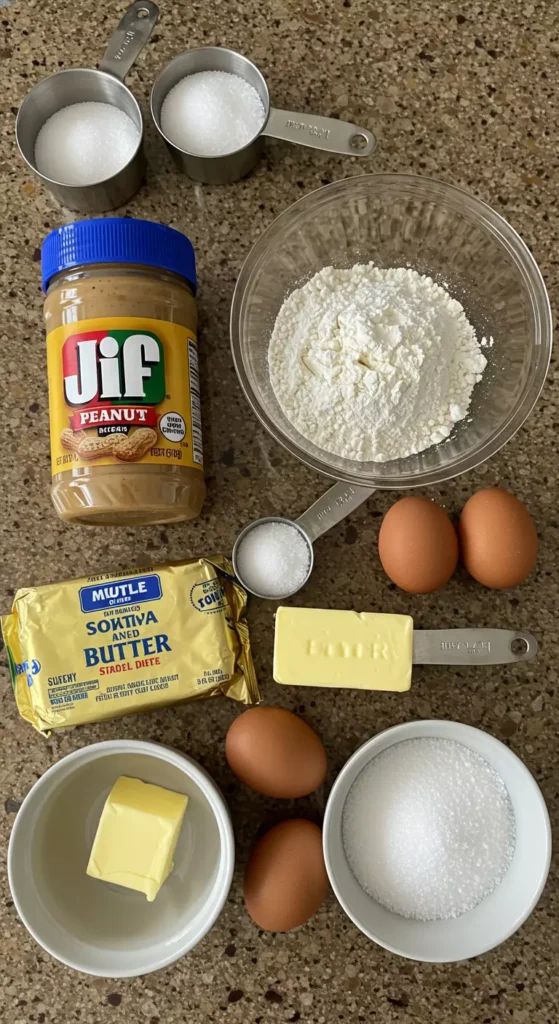
For the cookies:
- 1 cup creamy peanut butter (NOT the natural kind, seriously)
- 1/2 cup unsalted butter, softened (I forgot to take mine out of the fridge once and microwaved it… don’t do that)
- 1/2 cup granulated sugar
- 1/2 cup brown sugar, packed
- 1 large egg
- 1 teaspoon vanilla extract
- 1 1/2 cups all-purpose flour (you can use GF flour for GF Nutter butter cookies—I tested it)
- 1/2 teaspoon baking soda
- 1/2 teaspoon salt
For the filling:
- 3/4 cup creamy peanut butter
- 1/4 cup unsalted butter, softened
- 1 cup powdered sugar
- 2-3 tablespoons heavy cream (or milk, whatever you have)
Shopping tip: Buy an extra jar of peanut butter. You’re gonna want to snack on it while you bake. It’s science.
How to Make Nutter Butter Recipe at Home
Alright, let’s do this. Put on your favorite playlist because you’ll be here for a bit.
Step 1: Prep Your Stuff
Preheat your oven to 350°F. I learned the hard way that starting with a cold oven adds like 10 minutes to everything and throws off timing. Also, line two baking sheets with parchment paper. Don’t skip the parchment unless you enjoy scraping cookies off metal sheets with a spatula while crying. (Been there.)
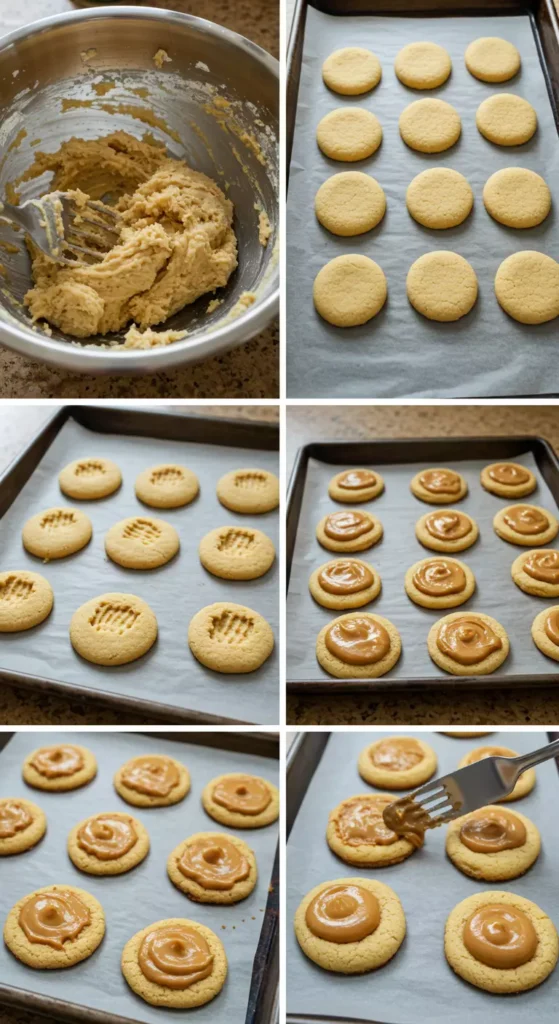
Step 2: Make the Cookie Dough
In a big bowl, cream together the peanut butter, butter, and both sugars. I use a hand mixer because I’m lazy, but you could do this by hand if you’re feeling ambitious or need an arm workout.
Beat it until it’s fluffy—takes about 2-3 minutes. It’ll look kinda pale and… fluffy. That’s the technical term. Add the egg and vanilla, mix until combined.
In another bowl (I know, dishes pile up fast), whisk together the flour, baking soda, and salt. Now here’s where I messed up the first time: I dumped all the dry stuff into the wet stuff at once and went crazy with the mixer. DON’T DO THAT. Add the flour mixture gradually and mix on LOW speed. Stop as soon as you don’t see dry flour anymore. Overmixed dough = flat cookies = sadness.
Step 3: Shape the Cookies
This is the fun part! Scoop out about 1 tablespoon of dough and roll it into a ball. Place it on your baking sheet and flatten it with a fork—but here’s the trick for making them look like actual Nutter Butters: make a crosshatch pattern with the fork, then use your fingers to kinda shape it into an oval-ish peanut shape.
Does it have to be perfect? Absolutely not. Mine look like deformed peanuts and taste amazing anyway.
Space them about 2 inches apart. They spread a little but not too much.
Step 4: Bake These Babies
Bake for 10-12 minutes. They should be lightly golden on the edges but still look slightly underdone in the center. And here’s something weird I discovered—they’ll look too soft when you take them out. That’s NORMAL. Don’t panic and put them back in like I did with batch number two. They firm up as they cool.
Let them cool on the baking sheet for 5 minutes (set a timer or you’ll forget like me), then transfer to a wire rack. Actually, you know what? I don’t even own a wire rack. I just use a clean kitchen towel on the counter. Works fine.
Step 5: Make the Filling
While the cookies are cooling—or honestly, you can make this ahead of time—beat together the peanut butter and butter until smooth. Add the powdered sugar gradually (unless you want a sugar cloud in your kitchen… learned that one the hard way too).
Add 2 tablespoons of heavy cream and mix. If it’s too thick, add the third tablespoon. You want it spreadable but not runny. Kinda like… thick frosting consistency?
Oh, and another thing… taste this filling. Just trust me. It’s incredible. I may have eaten half of it with a spoon before actually using it for the cookies.
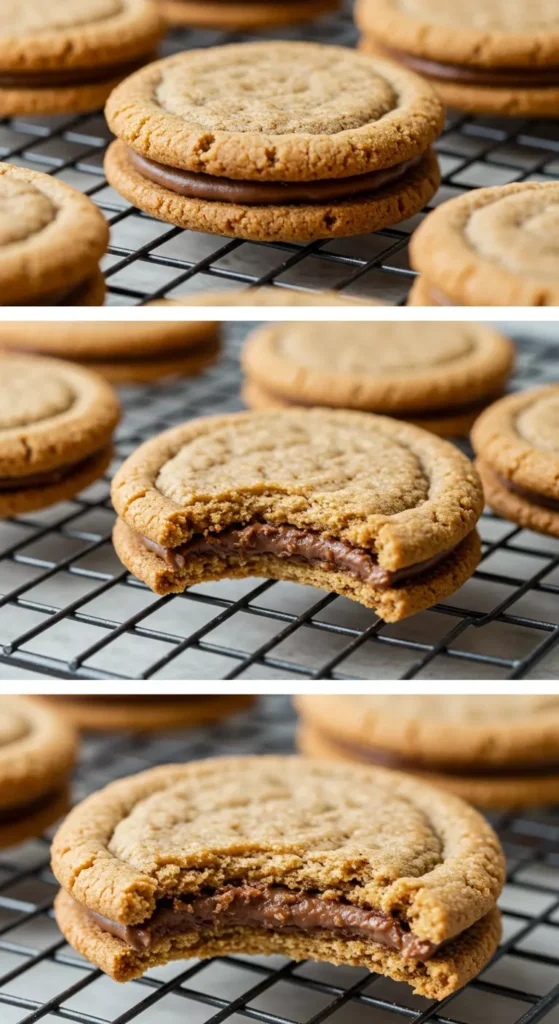
Step 6: Assemble Your Homemade Nutter Butter Cookies
Once the cookies are completely cool (warm cookies + filling = melty mess), spread about 1 tablespoon of filling on the flat side of one cookie. Top with another cookie. Press gently.
My 8-year-old helped with this part and got filling all over the kitchen counter, but honestly? It was worth it. He was so excited.
Tips for the Best Nutter Butter Cookies Ingredients
Don’t use natural peanut butter. I know I mentioned this already, but people keep asking. The oil separation makes everything weird. Just use regular Jif. Your cookies will thank you.
Room temperature ingredients matter. Cold butter doesn’t cream properly. I learned this in like, baking school… just kidding, I learned it from ruining multiple batches.
Make them mini! Use a smaller cookie scoop and you’ll get way more cookies. Perfect for Cooking with Karli nutter butter cookies style—bite-sized and adorable.
For Healthy Nutter Butters: You can use coconut sugar instead of regular sugar (the dough will be darker), and substitute half the all-purpose flour with whole wheat. I tried this for my health-conscious sister and she loved them. They’re still not exactly a salad, but better than the store version.
Storage: Keep these in an airtight container. They’ll stay fresh for about a week. Mine never last that long because my family devours them, but theoretically they keep well.
Variations I’ve Tried
Healthy nut butter cookies version: I made these with almond butter once when I was trying to be healthy. Worked pretty well actually! Different flavor but still good. Also tried sunflower seed butter for my nephew with nut allergies—totally worked.
Chocolate drizzle: Melt some chocolate chips and drizzle over the assembled cookies. Is it necessary? No. Is it delicious? Absolutely.
Lemon version: Okay so this is random, but I was making lemon crinkle cookies recipe the same week and accidentally grabbed the lemon extract instead of vanilla. Added it to a small batch of these. Weirdly good? Peanut butter and lemon is an underrated combo. Don’t knock it till you try it.
My Mistakes So You Don’t Have To Make Them
Remember how I said I messed this up twice? Let me share the disasters so you can avoid them:
Mistake #1: Used natural peanut butter. The cookies spread everywhere and were super oily. Had to throw out the whole batch.
Mistake #2: Overbaked them because I panicked when they looked too soft. They came out hard as rocks. My husband tried to eat one and I’m pretty sure he chipped a tooth. Maybe. He won’t admit it.
Mistake #3: Put the filling on while the cookies were still warm. It melted everywhere and I basically made peanut butter soup. Tasty soup, but still.
Why These Are Better Than Store-Bought
I don’t care what anyone says, these Homemade Copycat Nutter Butters are superior to the packaged version. The filling is creamier, the cookies are fresher, and you can pronounce every ingredient. Plus, making them from scratch just feels good, you know?
My mom tried them last week and got all emotional, saying they reminded her of making cookies with her grandmother. I wasn’t expecting that reaction but it was sweet.
And honestly? The house smells AMAZING while these bake. That alone is worth the effort.
Serving Suggestions
Eat them with a giant glass of cold milk. This is non-negotiable.
Pack them in lunchboxes (they travel well!).
Crumble them over ice cream. Sounds weird, tastes incredible.
Dip them in coffee. Game changer.
Make ice cream sandwiches with them. YOU’RE WELCOME.
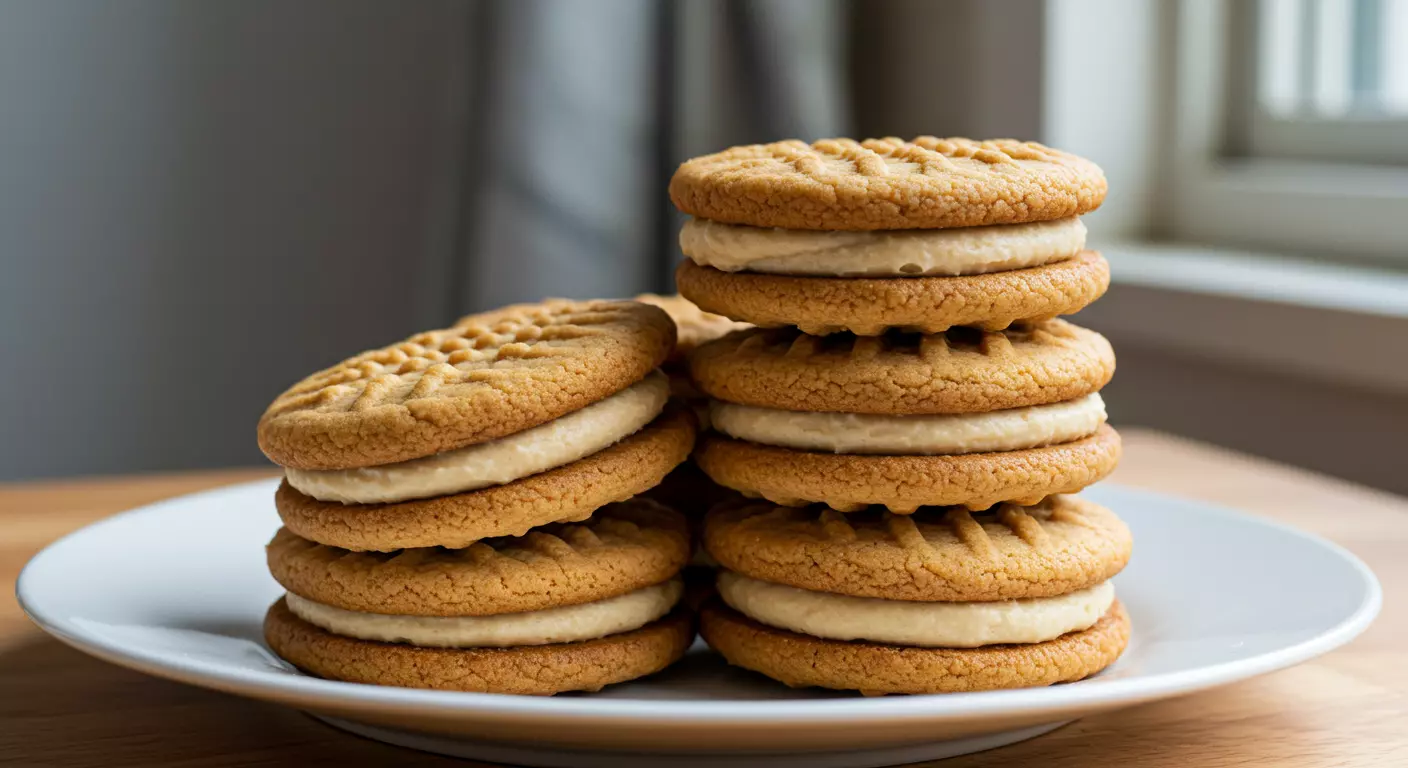
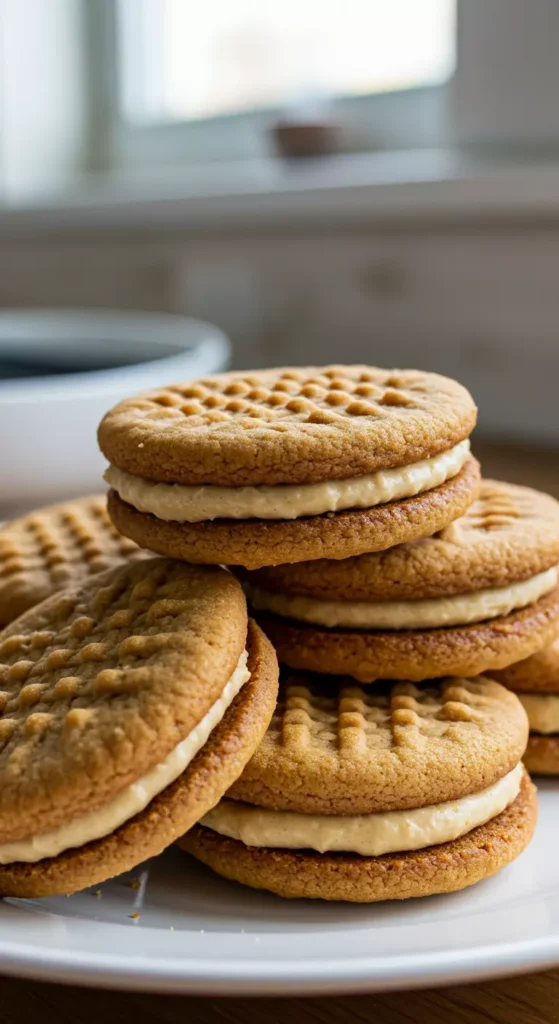
Homemade Copycat Nutter Butters
These homemade copycat Nutter Butters are crunchy peanut butter cookies with creamy filling that taste even better than the store-bought version. Easy recipe with simple ingredients and options for gluten-free and healthier versions.
Ingredients
- 1 cup creamy peanut butter
- 1/2 cup unsalted butter, softened
- 1/2 cup granulated sugar
- 1/2 cup brown sugar, packed
- 1 large egg
- 1 teaspoon vanilla extract
- 1 1/2 cups all-purpose flour
- 1/2 teaspoon baking soda
- 1/2 teaspoon salt
- 3/4 cup creamy peanut butter (for filling)
- 1/4 cup unsalted butter, softened (for filling)
- 1 cup powdered sugar
- 2-3 tablespoons heavy cream or milk
Instructions
-
Step 1Preheat oven to 350°F (175°C). Line two baking sheets with parchment paper.
-
Step 2In a large bowl, cream together 1 cup peanut butter, 1/2 cup butter, granulated sugar, and brown sugar until fluffy, about 2-3 minutes. Add egg and vanilla extract, mix until combined.
-
Step 3In a separate bowl, whisk together flour, baking soda, and salt.
-
Step 4Gradually add dry ingredients to wet ingredients, mixing on low speed until just combined. Do not overmix.
-
Step 5Scoop 1 tablespoon of dough and roll into balls. Place on baking sheet, flatten with fork in crosshatch pattern, and shape into oval peanut shapes. Space 2 inches apart.
-
Step 6Bake for 10-12 minutes until lightly golden on edges. Cookies will look slightly underdone in center. Let cool on baking sheet for 5 minutes, then transfer to cooling rack.
-
Step 7Beat together 3/4 cup peanut butter and 1/4 cup softened butter until smooth. Gradually add powdered sugar, then add 2-3 tablespoons heavy cream until spreadable consistency is reached.
-
Step 8Once cookies are completely cool, spread 1 tablespoon filling on flat side of one cookie. Top with another cookie and press gently.
-
Step 9Store in airtight container at room temperature for up to one week.
Final Thoughts on This Nutter Butter Recipe
Look, I’m not gonna pretend these are quick to make. They’re not. You need time, patience, and a willingness to accept that your first batch might not be perfect. But once you nail it? You’ll never want store-bought Nutter Butters again.
My kitchen looks like a peanut butter bomb exploded every time I make these, but my family is happy and that’s what counts, right?
If I can make these without burning down my kitchen (third time’s the charm!), you definitely can too.
Seriously, try this and tell me what you think. And if you have any tricks for making them even better, drop a comment because I’m always looking to improve my recipe game.
Happy baking! And may your cookies be crunchy and your filling be perfectly spreadable 🙂