Okay, so here’s the thing about Christmas sugar cookies – I’ve been making them for like eight years now, and I STILL managed to mess up a batch last week. True story. Left them in the oven an extra three minutes because I was wrapping presents and completely lost track of time. They turned into hockey pucks.
But you know what? That’s actually why I’m writing this. Because I’ve made every possible mistake with these christmas sugar cookies, and I’ve finally figured out what actually works. Not the fancy stuff you see on Instagram where everything’s perfect. The real deal that works in an actual kitchen with actual distractions.
Table of Contents

Why These Christmas Sugar Cookies Are Different
Look, I’m gonna be honest with you. I used to think all sugar cookie recipes were basically the same. Sugar, butter, flour, whatever. Wrong. So wrong.
The difference with these christmas sugar cookies decorated is that they’re actually soft. Not the crispy kind that shatter everywhere (my daughter’s teacher probably still hates me for sending those to school last year). These stay soft for days. Well, if they last that days. In my house? Gone in about 36 hours.
I got the base recipe from my neighbor’s mom, who got it from someone at church, who probably got it from a magazine in 1987. But I’ve tweaked it. A lot. The original version was… fine? But it needed work.
The Great Christmas Sugar Cookie Disaster of 2022
Speaking of tweaking – let me tell you about the year I decided to “improve” the recipe by adding almond extract. Seemed like a good idea at the time. My husband took one bite and said they tasted like hand soap. He wasn’t wrong. The kids wouldn’t even touch them, and my kids will eat literally anything with frosting on it.
That batch went straight to the trash, and I started over at 9 PM on Christmas Eve. Fun times.
What You’ll Need for Perfect Christmas Sugar Cookies
The Ingredients (Don’t Skip Anything)
Here’s what you need, and trust me, I’ve tried substituting basically everything at some point:
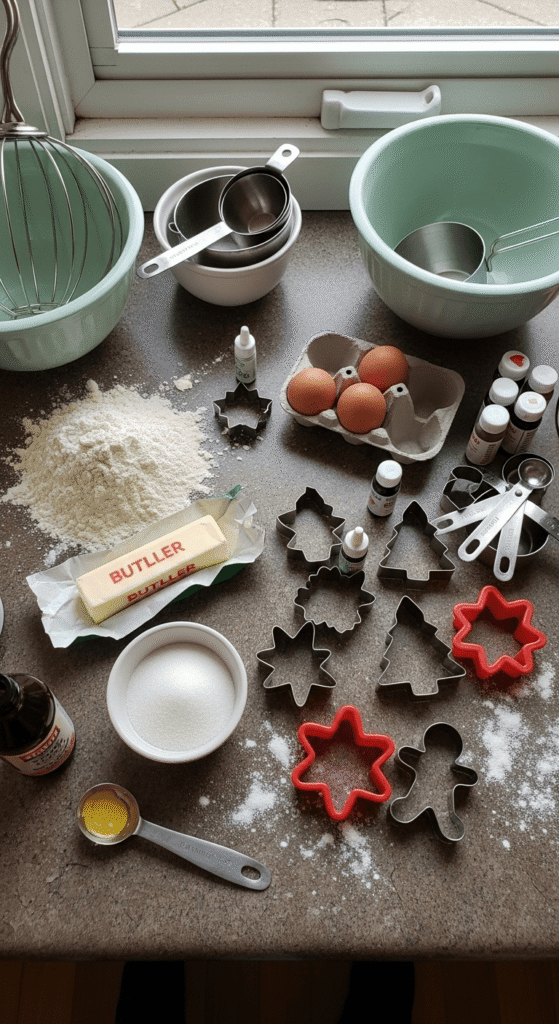
For the cookies:
- 3 cups all-purpose flour (I use Gold Medal, but whatever you have is fine)
- 1½ teaspoons baking powder
- ½ teaspoon salt
- 1 cup unsalted butter, softened (NOT melted – learned that one the hard way)
- 1½ cups granulated sugar
- 2 large eggs
- 2 teaspoons vanilla extract (use the real stuff, not imitation)
- ½ teaspoon almond extract (OPTIONAL – remember my soap cookies? Yeah.)
For the royal icing:
- 4 cups powdered sugar
- 3 tablespoons meringue powder
- 5-6 tablespoons water
- Food coloring (I buy the Wilton gel colors because the liquid ones make everything weird)
Pro tip about the butter – it needs to be actually soft. Not rock hard, not melted, but that perfect smooshy texture. I usually leave mine on the counter for like an hour. Sometimes I forget about it and it’s there for three hours. Still works.
Shopping Disasters You Can Avoid
Last year I went to three different stores trying to find meringue powder because apparently everyone in my town decided to make royal icing the same weekend. Finally found it at Michael’s craft store in the baking aisle. Who knew?
Also, don’t buy the pre-made cookie cutters from the dollar store. They’re flimsy and bend after like two uses. Invest in the metal ones. Worth it.
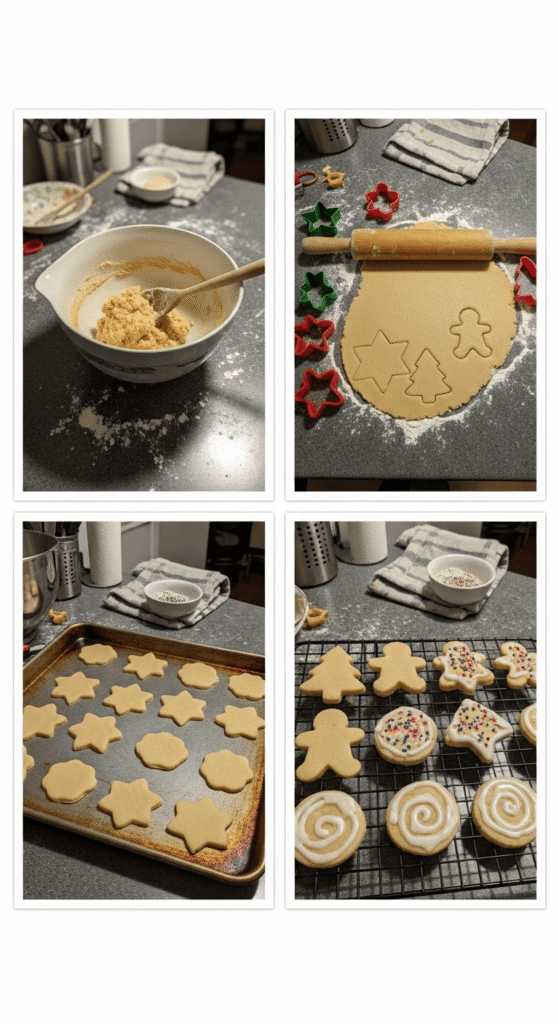
How to Make Christmas Sugar Cookies That Don’t Suck
Step 1: Mix the Dry Stuff
Whisk together your flour, baking powder, and salt in a bowl. Set it aside. That’s it. Don’t overthink this part.
Actually, you know what? I usually skip the whisking and just stir it with a fork because I’m lazy. Still works fine.
Step 2: Cream the Butter and Sugar
This is where people mess up. You need to beat the butter and sugar together until it’s light and fluffy. This takes like 3-4 minutes with a hand mixer. Your arm will get tired if you’re doing it by hand (been there).
It should look pale and… fluffy. That’s the only way I can describe it. If it looks like wet sand, keep going.
Step 3: Add Eggs and Vanilla
Crack in those eggs one at a time, mixing after each one. Then add your vanilla extract. Mix until everything’s combined.
Here’s where I almost added that cursed almond extract again last week out of habit. Caught myself just in time. Some wounds never heal.
Step 4: The Flour Situation
Now, here’s where things get real. Add your flour mixture gradually. I usually do it in three parts because dumping it all at once creates a flour explosion that coats your entire kitchen. Ask me how I know.
Mix on LOW speed. This is important. High speed = flour everywhere + tough cookies. Low speed = happiness.
The dough will look shaggy at first, kinda like it’s never gonna come together, but keep mixing until it forms a ball. Should take about a minute.
Step 5: Chill Time (And I Mean It)
Divide the dough in half, wrap each half in plastic wrap, and stick it in the fridge for AT LEAST an hour. I usually do two hours. One time I tried to skip this step because I was in a hurry.
Disaster. Complete disaster. The cookies spread everywhere and looked like amoebas.
I’ve also left the dough in the fridge overnight and it worked perfectly fine, so there’s that.
Step 6: Rolling and Cutting
Okay, this part used to drive me absolutely crazy until I figured out the trick. Lightly flour your surface AND your rolling pin. Roll the dough to about ¼ inch thick. Any thinner and they’re too crispy. Any thicker and they’re kinda… doughy? In a bad way.
Cut out your shapes. I have like 30 different cookie cutters now because I can’t stop buying them. The snowflakes and Christmas trees are the easiest to decorate. The reindeer? Nightmare. So many antlers to fill in.
Pro tip: Re-roll the scraps, but only once. After that the dough gets tough from being handled too much.
Step 7: Baking These Bad Boys
Preheat your oven to 350°F. Line your baking sheets with parchment paper (or those silicone mats if you’re fancy).
Bake for 8-10 minutes. They should NOT be brown. Maybe slightly golden on the edges if you’re pushing it, but that’s it. They’ll look underdone when you take them out. THAT’S NORMAL. Trust the process.
Let them cool on the pan for 5 minutes, then move to a wire rack. If you try to move them too soon, they’ll break. I’ve broken approximately 847 cookies this way over the years.
The Royal Icing Situation
Making the Icing
This used to intimidate me so much. Now? It’s actually the easiest part.
Beat together powdered sugar and meringue powder. Add water one tablespoon at a time until you get the consistency you want.
For outlining: Thicker icing (holds its shape) For flooding: Thinner icing (spreads smooth)
I usually make it thick first, then thin some out with more water for flooding. Divide into bowls and add your food coloring.
Here’s something nobody tells you – the icing looks WAY brighter in the bowl than it does on the cookies. Like, add more color than you think you need. I made pastel pink cookies last year that basically looked white in photos. Learned that lesson.
Decorating Christmas Sugar Cookies (The Fun Part)
This is where you can go crazy. Or keep it simple. Both are fine.
My go-to method:
- Outline the cookie with thick icing in a piping bag
- Wait like 10 minutes for it to set slightly
- Fill in with thinner icing (I use a squeeze bottle for this – game changer)
- Add sprinkles while it’s wet if you want them to stick
The icing takes FOREVER to dry. Like 8-12 hours. Sometimes I decorate cookies at night and leave them on the counter overnight. My cat knocked over an entire tray once at 3 AM. I’m still not over it.
Tips I’ve Learned the Hard Way
Temperature matters. If your kitchen is super cold, the butter in the dough stays solid and cookies spread less. If it’s warm, they spread more. I have no solution for this, just… be aware.
Don’t stack them. Even when the icing looks dry, it’s not. I stacked cookies once in a container and they all stuck together. Had to serve “cookie abstract art” at the party.
Freeze the dough. These christmas sugar cookies recipes easy to make ahead. I freeze dough all the time. Just thaw in the fridge before rolling.
Royal icing is edible glue. Use it to fix broken cookies. Nobody will know. I’ve served so many “repaired” cookies.
Let kids help. Yeah, they’ll make a mess. Yeah, some cookies will have 47 colors mixed into brown mud. But they’ll remember it forever. My daughter still talks about the year she made a “rainbow snowman” that looked like it went through a blender.
Common Christmas Sugar Cookie Problems (And Solutions)
Cookies spreading too much? Dough wasn’t cold enough. Or you used melted butter instead of softened. Or both.
Cookies too hard? Overbaked. Lower temp next time, or watch them more carefully. Set like three timers if you have to.
Icing won’t harden? Too much water, or your humidity is crazy high. Add more powdered sugar to thicken it up.
Dough too sticky? Add a bit more flour, tablespoon at a time. But don’t go crazy or cookies get tough.
Why I Keep Making These Every Year
Look, I could buy cookies from the bakery. They’d probably look better. But there’s something about making christmas sugar cookies decorated easy at home that just feels… right?
Plus my kids would riot if I stopped. Last year my son literally cried when I suggested maybe we could skip cookie decorating and just buy some. Actual tears.
And honestly? Even the ugly ones taste amazing. That batch I made at 9 PM on Christmas Eve? They were lopsided and mostly undecorated because I ran out of time and energy. Everyone loved them anyway.
The Bottom Line
These christmas sugar cookies are soft, buttery, and perfect for decorating. They’re not complicated, even though they feel fancy. The key is actually following the recipe (wow, revolutionary concept) and not rushing the chilling time.
Will your first batch be perfect? Probably not. Mine sure wasn’t. But who cares? They’ll taste good and you’ll figure out what works in your kitchen with your oven and your attention span.
Make a mess. Use too many sprinkles. Let the dough chill properly. Don’t add almond extract unless you want soap cookies.
And seriously, if I can make these without completely losing it, anyone can.
Happy baking! (And may your cookies be soft and your icing be smooth.)
Let me know how yours turn out! Especially if you discover any new ways to mess them up that I haven’t found yet. Always learning over here. 😊