Table of Contents
Okay, so here’s the thing about Christmas sugar cookies—I’ve been making these for, what, maybe ten years now? And honestly, the first few years were… rough. Like, really rough. I’m talking cookies that spread into weird blob shapes and frosting that looked like a toddler attacked it with food coloring. But now? Now I’ve got it down, and people actually ask me to make these every year.
Look, I’m gonna be honest with you. These christmas sugar cookies aren’t some fancy bakery-level masterpiece. They’re just really, really good homemade cookies that stay soft (that’s the key, people!), taste amazing, and are actually fun to decorate without wanting to throw your piping bag across the kitchen.
Why These Christmas Sugar Cookies Are Actually Worth Making
So everyone and their mom has a sugar cookie recipe, right? But most of them are either too crispy (hate that), too bland (what’s the point?), or they spread so much in the oven that your cute Christmas tree becomes a green pancake. Been there, done that, have the therapy bills to prove it.
What makes these different? The dough is soft but workable—you’re not gonna be fighting with it for an hour. The cookies keep their shape when they bake (FINALLY). And they stay soft for days. Like, genuinely soft, not that fake-soft-but-actually-stale thing that happens with most sugar cookies.
My neighbor Janet makes sugar cookies every year that could double as hockey pucks. Sweet lady, terrible cookies. I gave her this recipe last Christmas and she actually texted me at 11 PM saying “WHERE HAS THIS BEEN ALL MY LIFE??” All caps. She’s 67.
The Great Sugar Cookie Disaster of 2019
Can we talk about my biggest christmas sugar cookies failure? Because I need you to know that even though this recipe is pretty foolproof now, I definitely… proofed it? Tested it? Destroyed multiple batches learning what NOT to do?
December 2019. I decided to make cookies for my kid’s entire preschool class. That’s 18 kids. So, like, probably 100 cookies with all the shapes and everything. Ambitious? Sure. Stupid? Absolutely.
First batch: forgot to chill the dough. They spread everywhere and merged into one giant super-cookie. Looked like something from a horror movie.
Second batch: overworked the dough trying to fix batch one. Cookies came out tough and chewy. Not in a good way.
Third batch: finally figured it out, but then my 8-year-old “helped” by dumping an entire bottle of green food coloring into the frosting. Everything was radioactive green. The reindeer. The snowflakes. Everything.
We gave them out anyway. The kids loved them. The parents definitely judged me.
What You’ll Need for Christmas Sugar Cookies
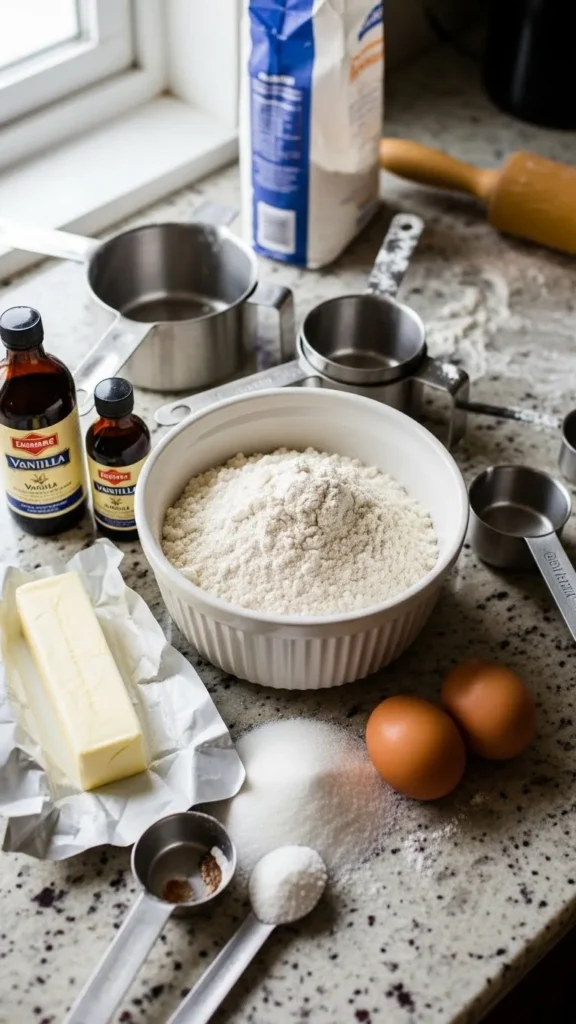
For the Cookies:
- 3 cups all-purpose flour (just regular flour, nothing fancy)
- 1½ teaspoons baking powder (make sure it’s not expired—learned that one the hard way)
- ½ teaspoon salt
- 1 cup unsalted butter, softened (seriously, let it sit on the counter for like 30 minutes—this matters)
- 1½ cups granulated sugar
- 2 large eggs
- 2 teaspoons vanilla extract (I use the real stuff, but honestly imitation works fine)
- ½ teaspoon almond extract (this is my secret weapon—don’t skip it!)
For the Royal Icing (or “The Fun Part” as my kids call it):
- 4 cups powdered sugar (you’ll get it everywhere, just accept it now)
- 3 tablespoons meringue powder (found in the baking aisle, usually near cake decorating stuff)
- 5-6 tablespoons warm water (more or less depending on consistency you want)
- Food coloring (gel colors work way better than liquid, trust me)
Quick shopping tip: Don’t buy the cheap butter. Like, I’m all for saving money, but cheap butter makes weird-tasting cookies. Get the good stuff. It’s Christmas.
Also, meringue powder sounds fancy but it’s just at any grocery store in the baking section. I couldn’t find it once and tried to make royal icing without it. Disaster. Complete disaster. Just get the meringue powder.
Let’s Make These Christmas Sugar Cookies!
Step 1: Mix the Dry Stuff
Whisk together flour, baking powder, and salt in a medium bowl. Set it aside. That’s it. Super complicated, right?
(I always make a mess during this step because I apparently never learned to whisk gently. Flour cloud everywhere. Every single time.)
Step 2: Cream the Butter and Sugar
In a large bowl (or stand mixer if you’re fancy), beat the softened butter and sugar together until it’s light and fluffy. This takes like 3-4 minutes with an electric mixer. Your arm will fall off if you try it by hand. Don’t be a hero.
It should look kinda pale and… fluffy. That’s the technical term. Fluffy.
Step 3: Add Eggs and Extracts
Beat in the eggs one at a time. Then add vanilla and almond extract. The almond extract is what makes people say “what IS that flavor? These taste amazing!” and you can be all mysterious about it if you want.
Mix until everything’s combined. Don’t overmix. I don’t know what overmixing technically does, but my mom always said don’t do it, so I don’t do it.
Step 4: Combine Wet and Dry
Gradually add the flour mixture to the butter mixture. I do it in like three parts, mixing on low speed between each addition. This is where the dough comes together and starts looking like actual cookie dough instead of just… ingredients.
Step 5: Chill Out (The Dough, Not You… But Maybe You Too)
Here’s where patience is required. Divide dough in half, wrap each half in plastic wrap, and refrigerate for AT LEAST 2 hours. I usually do 3 hours or even overnight because I’m paranoid about the spreading thing.
I know waiting sucks. Order pizza. Watch a movie. Do literally anything else because this step is non-negotiable.
Tried to skip it once because I was running late. Ended up with those blob cookies I mentioned earlier. The Christmas trees looked like green tumors. Learn from my mistakes.
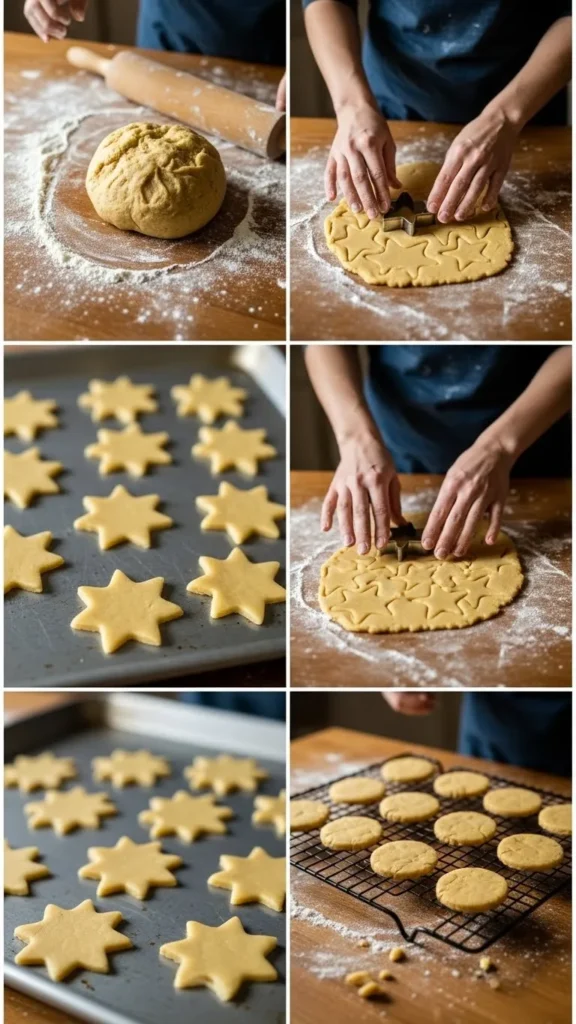
Step 6: Roll and Cut
Preheat oven to 350°F (don’t forget this step—I almost always forget this step).
Take out one dough disk at a time (leave the other in the fridge). Roll it out on a floured surface to about ¼ inch thick. Not too thin or they’ll be crispy. Not too thick or they won’t bake evenly.
Cut out your shapes! Christmas trees, snowflakes, reindeer, stars—whatever makes you happy. I have like 30 cookie cutters at this point. It’s become a problem. My husband built me a special drawer for them.
Place cookies on parchment-lined baking sheets about 2 inches apart. They don’t spread much, but give them some room anyway.
Step 7: Bake These Beauties
Bake for 8-10 minutes. They should NOT be brown. Like, at all. Maybe barely golden on the bottom if you look really closely, but mostly they should look almost underbaked.
This is crucial: they’ll firm up as they cool. If you bake them until they look “done,” they’ll be too hard when they cool down.
Set timer for 8 minutes, then check them. My oven runs hot so mine are usually done at 9 minutes. Your oven might be different. Get to know your oven. Become friends with your oven.
Let them cool on the baking sheet for 5 minutes (they’re soft and will break if you move them too soon—yes, I’ve done this). Then transfer to a wire rack to cool completely before frosting.
Making Royal Icing That Won’t Make You Cry
Okay, royal icing. This stuff dries hard and shiny and looks professional even when applied by amateurs like us.
Beat together powdered sugar, meringue powder, and water with an electric mixer on low speed for about 7-8 minutes. Yes, that long. It should be thick and glossy. This is “stiff consistency”—good for making borders and details.
For “flood consistency” (filling in large areas), add more water one teaspoon at a time until it’s thinner but not runny. When you lift the whisk, the icing should settle back into itself within about 10 seconds. That’s the sweet spot.
Divide into bowls and add food coloring. Gel colors are WAY better than liquid—they’re more vibrant and don’t thin out your icing.
Decorating Tips from Someone Who’s Not a Professional
- Outline first, then flood. Use the thicker icing to make an outline around your cookie, then fill in the middle with the thinner icing. Sounds fancy, actually pretty easy.
- Toothpicks are your friend. Use them to spread icing into corners and pop any air bubbles.
- Let each color dry before adding another. Unless you want colors bleeding together (which sometimes looks cool, actually).
- Sprinkles while it’s wet! Once that icing dries, sprinkles won’t stick.
- Don’t stress perfection. My “snowflakes” usually look more like mutant stars, and that’s fine. They taste the same.
My kids’ decorated christmas sugar cookies always look like abstract art, but honestly? Those are everyone’s favorites. Something about the wonky charm.
Storage (If They Last That Long)
Store unfrosted cookies in an airtight container for up to a week. They’ll stay soft. It’s magic.
Frosted cookies: once the icing is completely dry (give it like 4-6 hours or overnight), you can stack them between layers of parchment paper. They’ll keep for about a week at room temperature.
Can you freeze them? Yeah! Unfrosted cookies freeze great for up to 3 months. Frosted ones… technically you can, but the icing sometimes gets weird when they thaw. I just make fresh batches.
Who am I kidding? These never last long enough to worry about storage. They disappear within days at my house.
Real Talk About Christmas Sugar Cookies
Look, I’m not gonna pretend these are health food. They’re sugar cookies. They’re made with butter and sugar and more sugar. But it’s Christmas. Life is short. Eat the cookies.
That said, these are surprisingly not-too-sweet compared to a lot of recipes. The almond extract adds depth so you’re not just tasting SUGAR in all caps.
Are they better than store-bought? Um, yeah. Obviously. Store-bought sugar cookies taste like cardboard with frosting. These actually taste like… cookies. Real cookies made by real people in real kitchens.
Will your kids want to help decorate? Absolutely. Will it be messy? Also absolutely. Will they eat half the frosting straight from the bowl? Count on it. But those are the memories, right? The messy, frosting-covered, sprinkle-everywhere memories.
Why People Love These Christmas Sugar Cookies
Last year I brought these to my office holiday party (back when those were a thing), and three different people asked for the recipe. One guy—who I’d never seen eat a dessert before—ate FIVE. He counted. Then looked embarrassed. Then ate a sixth one when he thought no one was looking.
My sister, who’s usually very “meh” about my baking, actually said these were “legitimately really good.” That’s high praise from her. She once told me my lasagna was “edible,” which I later learned was her way of saying it was delicious. She’s weird with compliments.
The thing about these cookies is they’re not trying to be fancy. They’re just solid, reliable, really tasty christmas sugar cookies that remind you of childhood and holidays and all that good stuff. Cozy vibes, you know?
And honestly, if I can make these without completely messing them up (mostly), anyone can. You don’t need to be a professional baker. You just need butter, sugar, some patience during the chilling part, and a willingness to embrace imperfection.
Because perfect cookies are boring. Slightly wonky homemade christmas sugar cookies with too many sprinkles and questionable decorating choices? Those are the good ones.
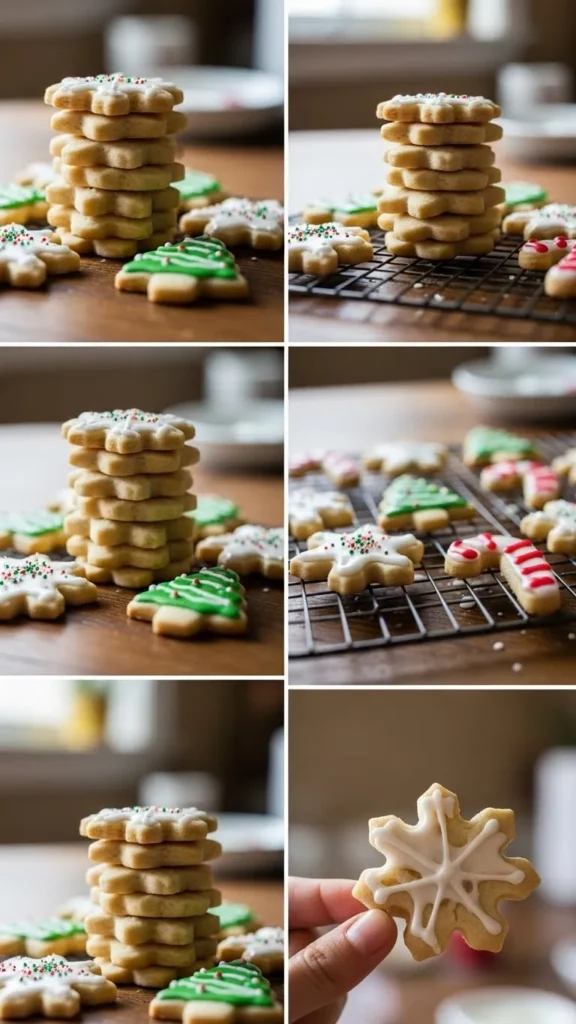
Classic Christmas Sugar Cookies – Soft, Sweet & Perfectly Frosted!
Soft, perfectly shaped Christmas sugar cookies that stay soft for days! Easy recipe with royal icing decorating tips for festive holiday cookies everyone will love.
Ingredients
- 3 cups all-purpose flour
- 1½ teaspoons baking powder
- ½ teaspoon salt
- 1 cup unsalted butter, softened
- 1½ cups granulated sugar
- 2 large eggs
- 2 teaspoons vanilla extract
- ½ teaspoon almond extract
- 4 cups powdered sugar (for icing)
- 3 tablespoons meringue powder
- 5-6 tablespoons warm water
- Food coloring (gel colors preferred)
Instructions
-
Step 1Whisk together flour, baking powder, and salt in a medium bowl. Set aside.
-
Step 2In a large bowl, beat softened butter and sugar together until light and fluffy, about 3-4 minutes.
-
Step 3Beat in eggs one at a time, then add vanilla and almond extract. Mix until well combined.
-
Step 4Gradually add flour mixture to butter mixture in three parts, mixing on low speed between additions until dough forms.
-
Step 5Divide dough in half, wrap each half in plastic wrap, and refrigerate for at least 2-3 hours or overnight.
-
Step 6Preheat oven to 350°F (175°C). Line baking sheets with parchment paper.
-
Step 7Roll out one dough disk at a time on floured surface to ¼ inch thickness. Cut out shapes with cookie cutters and place on prepared baking sheets 2 inches apart.
-
Step 8Bake for 8-10 minutes until edges are barely set but not browned. Cookies should look slightly underbaked.
-
Step 9Let cookies cool on baking sheet for 5 minutes, then transfer to wire rack to cool completely before decorating.
-
Step 10Beat together powdered sugar, meringue powder, and water with electric mixer on low speed for 7-8 minutes until thick and glossy. Adjust consistency with additional water as needed.
-
Step 11Divide icing, add food coloring, and decorate cooled cookies using thicker icing for outlines and thinner icing for flooding. Add sprinkles while icing is still wet.
Final Thoughts
Make these christmas sugar cookies. Seriously. Make them with your kids, your partner, your friends, or just yourself at 11 PM on a Wednesday because you’re having a rough week and need something good in your life.
The recipe makes a lot—you’ll get like 3-4 dozen depending on your cutter sizes—so share them. Neighbors love them. Coworkers love them. Mail carriers love them (I gave some to ours last year and now he’s extra nice about packages).
And if they don’t turn out perfect the first time? That’s fine. Mine didn’t either. But they were still delicious, and that’s what matters.
Now I’m craving these and it’s not even December yet. Great. 🎄