Okay, so here’s the thing. I was trying to figure out what to do with this bag of apples that’s been sitting on my counter for like a week, and my brain randomly went to cheesecake. Don’t ask me why. But then I thought… wait, what if I just stuffed cheesecake INTO the apples?
Genius or crazy? Honestly, a little bit of both.
Look, I’m gonna be honest with you. The first time I made these Cheesecake Stuffed Baked Apples, I completely messed up the filling. Made it way too runny because I was texting my sister and not paying attention to measurements. The whole thing leaked out all over my baking dish and created this weird apple-cheesecake soup situation. Not cute.
But the second time? PERFECTION. Well, almost. Good enough that my neighbor Karen literally knocked on my door the next day asking for the recipe because she could smell them baking. (Side note: why can she always smell what I’m cooking? It’s like she has superpowers or something.)
Table of Contents
Why These Cheesecake Stuffed Baked Apples Are Actually Genius
So basically what you’re doing here is taking the best parts of two desserts and smashing them together. The apples get all soft and tender and slightly caramelized. The cheesecake filling gets warm and creamy but still holds its shape. It’s like… fancy but also super easy?
My 11-year-old daughter, who normally won’t touch anything that involves fruit and “healthy stuff,” devoured two of these in one sitting. TWO. I was honestly shocked.
And here’s what I love most about this recipe—it LOOKS impressive. Like, you could serve these at a dinner party and people would think you spent hours on them. But between you and me? Total active time is maybe 20 minutes. The oven does all the hard work.
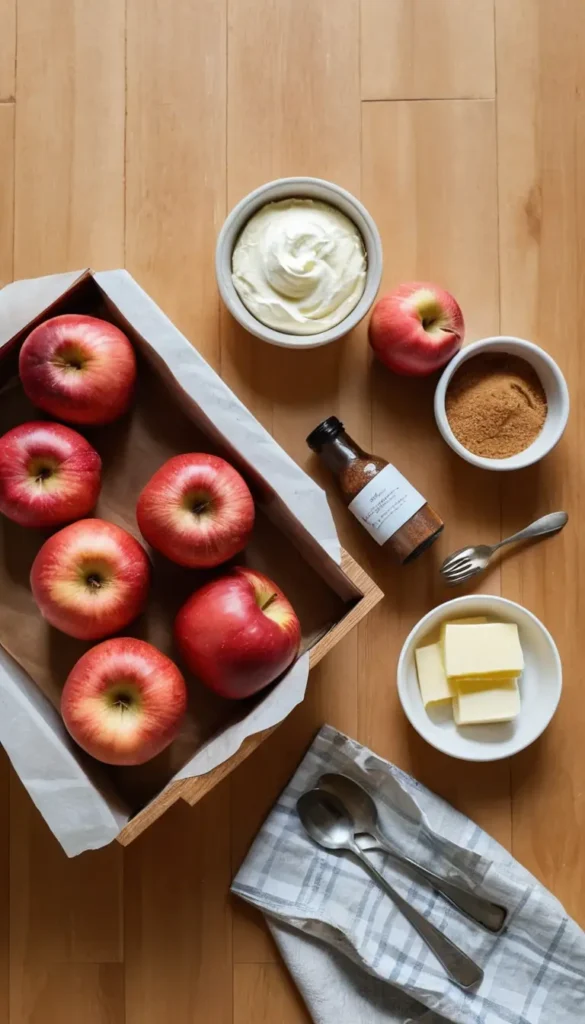
What You’ll Need for These Cheesecake Baked Stuffed Apples
Alright, shopping time. Most of this stuff you probably already have, which is always a win in my book.
For the Apples:
- 6 medium Honeycrisp or Granny Smith apples (I prefer Honeycrisp because they’re sweeter, but Granny Smith works if you like that tart thing)
- Listen, picking good apples matters here. They need to be firm enough to hold their shape. I learned this the hard way when I used some sad, mealy apples from the back of my fridge. Disaster. Complete disaster.
For the Cheesecake Filling:
- 8 oz cream cheese, softened (and I mean REALLY softened—leave it out for like an hour)
- 1/4 cup granulated sugar
- 1 large egg
- 1 teaspoon vanilla extract (the real stuff, not imitation)
- 2 tablespoons sour cream
- Tiny pinch of salt
For the Topping:
- 1/4 cup brown sugar
- 1 teaspoon cinnamon
- 2 tablespoons melted butter
- Optional: chopped pecans or walnuts (I use pecans because my husband thinks walnuts taste like sadness)
You’ll also need:
- A melon baller or sturdy spoon for scooping
- 9×13 baking dish
- Some foil
- Patience (just kidding, this is actually pretty quick)
Pro tip from my many failures: Don’t even THINK about using low-fat cream cheese. I tried it once thinking I was being healthy or whatever, and the filling turned out grainy and weird. Full-fat or nothing, people.
How to Make Cheesecake Stuffed Baked Apples (Without Losing Your Mind)
Step 1: Prep Your Apples
Preheat your oven to 375°F. Actually, do this first before anything else because I always forget and then I’m standing there with stuffed apples and a cold oven feeling like an idiot.
Now, grab your apples and slice off the top—like you’re giving them a little haircut. About 1/4 inch off the top. Save these tops! You’ll need them later. Or, you know, eat them as a snack. I won’t judge.
Next, use a melon baller or spoon to scoop out the core and seeds. Make a nice little cavity in there, but—and this is important—don’t go all the way through the bottom. I did this on my third attempt and the filling just… fell out. It was like watching a very slow, very sad waterfall.
Leave about 1/4 inch at the bottom as a base. The walls should be about 1/4 inch thick too. Basically, you’re making an apple bowl.
Step 2: Make the Cheesecake Filling
This is where it gets good.
Throw your softened cream cheese into a bowl. If you forgot to take it out early and it’s still hard, microwave it for like 10 seconds. Just 10! Any more and it’ll be weird and melty.
Beat it with a mixer (or a really aggressive spoon if you’re feeling ambitious) until it’s smooth and fluffy. Then add your sugar and beat again until combined. It should look light and creamy, not chunky.
Crack in the egg. Beat it in well. Add your vanilla, sour cream, and that pinch of salt. Mix until everything is combined and smooth. The mixture should be thick but spoonable. If it’s runny, you messed up. Ask me how I know.
Step 3: Stuff Those Apples
Place your hollowed-out apples in a 9×13 baking dish. They should fit snugly but not be touching each other. Give them some personal space.
Spoon the cheesecake filling into each apple cavity. Fill them generously but don’t overfill—they need some room to expand slightly as they bake. I learned this when I overstuffed them and the filling bubbled over like a science experiment gone wrong.
You should have just enough filling for all 6 apples. If you have extra, honestly just eat it with a spoon. It’s basically cheesecake batter and it’s delicious.
Step 4: Make the Cinnamon-Sugar Topping
In a small bowl, mix together the brown sugar, cinnamon, and melted butter. It’ll look like wet sand. That’s exactly what you want.
Sprinkle this mixture generously over the top of each stuffed apple. Don’t be shy. This is what creates that amazing caramelized crust on top.
If you’re using nuts (and you should, they’re GOOD), sprinkle those on top too. Press them in gently so they stick.
Step 5: Bake These Bad Boys
Put the apple tops back on like little hats. So cute, right?
Pour about 1/4 cup of water into the bottom of the baking dish. This creates steam and helps the apples cook evenly without drying out. Learned this trick from my mom, who learned it from HER mom, so you know it’s legit.
Cover the whole dish with foil. Bake for 25 minutes covered.
After 25 minutes, remove the foil and bake for another 15-20 minutes uncovered. The apples should be tender when you poke them with a fork, and the tops should be golden and slightly crispy. The cheesecake filling will be set but still a little jiggly in the center. That’s PERFECT. It’ll firm up as it cools.
Total baking time is about 40-45 minutes, but ovens are weird and all different, so just keep an eye on things after the 35-minute mark.
Tips from Someone Who’s Messed This Up Multiple Times
Temperature matters. If your cream cheese isn’t soft enough, you’ll get lumpy filling. If it’s TOO soft, the filling will be runny. Room temperature is the sweet spot. I usually set mine out when I start my morning coffee, and by afternoon it’s perfect.
Apple choice is crucial. I’ve tried this with Red Delicious (mistake), Fuji (okay but got mushy), and even those tiny apples from Trader Joe’s (cute but impractical). Honeycrisp and Granny Smith are the winners. Honeycrisp if you want sweeter, Granny Smith if you want that sweet-tart contrast.
Don’t skip the water in the pan. First time I made these, I forgot the water and the apples got weirdly dry on the outside while the filling was still raw. Not cute.
These are best served warm but not HOT. Let them cool for about 10 minutes after baking. The filling needs to set up a bit. But they’re also good at room temperature or even cold from the fridge the next day. Actually, cold from the fridge is kind of amazing. It’s like eating a weird apple cheesecake hybrid and I’m here for it.
Serving Suggestions (From Real Life Experience)
I serve these with a scoop of vanilla ice cream on top. Is it overkill? Maybe. Do I care? Absolutely not.
Caramel sauce is also INCREDIBLE drizzled over these. The store-bought kind is fine, don’t be a hero and try to make it from scratch unless you’re into that.
They’re actually really good for breakfast too. Don’t @ me. There’s fruit and dairy and… okay, it’s basically dessert for breakfast but sometimes that’s what you need on a Tuesday morning.
What to Do If Things Go Wrong
Filling leaked everywhere? Your apples probably had holes in the bottom. Scoop up that leaked filling with a spoon and eat it. Lesson learned for next time.
Apples are mushy? You overbaked them or used soft apples to begin with. They’re still edible, just not as pretty.
Filling didn’t set? Your oven might run cool, or you didn’t bake them long enough. Pop them back in for another 5-10 minutes.
Everything burned? Okay, not sure how you managed that with this recipe, but next time watch your oven temperature and maybe don’t answer work emails while baking.
Why You Should Make Cheesecake Stuffed Baked Apples This Week
Look, I don’t usually get all preachy about recipes, but this one is genuinely great. It’s easy enough for a weeknight but fancy enough for company. It uses simple ingredients. It makes your house smell AMAZING. And it’s actually kind of healthy? I mean, there’s fruit involved, so that counts for something.
Plus, it’s the kind of dessert that makes people think you’re a way better cook than you actually are. Not that I’m saying you’re a bad cook! I’m just saying… you know what I mean.
My husband, who usually just says “it’s good” about everything I make, actually stopped mid-bite and said “Whoa, this is really good.” HIGH PRAISE from a man who once told me a Michelin-starred meal was “pretty decent.”
If you’re looking for something different from the usual apple crisp or pie situation, this is it. And if you’re trying to impress your mother-in-law or intimidate the other parents at the bake sale, DEFINITELY make these.
Easy Cajun Chicken Sloppy Joes Recipe
A delicious twist on classic sloppy joes using ground chicken with Cajun spices. This easy recipe comes together in 30 minutes with simple ingredients for a flavorful weeknight dinner the whole family will love.
Ingredients
- 1.5 lbs ground chicken
- 1 tablespoon olive oil
- 1 medium onion, diced
- 1 green bell pepper, diced
- 3 cloves garlic, minced
- 1 tablespoon Cajun seasoning
- 1 teaspoon smoked paprika
- 1/2 teaspoon cayenne pepper
- Salt and pepper to taste
- 1 cup tomato sauce
- 1/4 cup ketchup
- 2 tablespoons tomato paste
- 1 tablespoon Worcestershire sauce
- 1 tablespoon brown sugar
- 1 teaspoon Dijon mustard
- 1/2 cup chicken broth
- 6-8 hamburger buns
- Shredded cheddar cheese for serving
- Dill pickle chips for serving
Instructions
-
Step 1Dice the onion and bell pepper. Mince the garlic. Have all ingredients measured and ready before cooking.
-
Step 2Heat olive oil in a large skillet over medium-high heat. Add ground chicken and cook for 5-7 minutes, breaking it up with a spatula, until mostly cooked through and starting to brown.
-
Step 3Add diced onion and bell pepper to the skillet. Cook for 5 minutes until vegetables start to soften. Add minced garlic and cook for 30 seconds until fragrant.
-
Step 4Stir in Cajun seasoning, smoked paprika, cayenne pepper, salt, and black pepper. Cook for 1 minute to bloom the spices.
-
Step 5Pour in tomato sauce, ketchup, tomato paste, Worcestershire sauce, brown sugar, Dijon mustard, and chicken broth. Stir everything together until well combined.
-
Step 6Bring mixture to a simmer, then reduce heat to medium-low. Let it cook for 10-12 minutes, stirring occasionally, until sauce thickens. Taste and adjust seasonings as needed.
-
Step 7While mixture simmers, toast hamburger buns in a dry skillet for 1-2 minutes until golden brown on the cut sides.
-
Step 8Spoon Cajun chicken mixture onto bottom buns. Top with shredded cheddar cheese and pickle chips. Place top bun on and serve immediately.
Final Thoughts on These Cheesecake Baked Stuffed Apples
I’ve made these probably a dozen times now since my initial disasters, and they never disappoint. They’re in my regular fall rotation, along with that weird pumpkin soup I’m obsessed with and those cajun chicken sloppy joes easy recipe that my kids actually eat without complaining.
Try them. Seriously. And then come back and tell me what you think because I’m genuinely curious if they work as well in your kitchen as they do in mine.
Happy baking! (And may your apple cavities be hole-free.)