Okay, so everyone keeps asking me for this Salted Caramel Apple Pie Cheesecake recipe, and honestly? I’ve been gatekeeping it a little. Not because I’m mean, but because explaining it feels like… a lot. But here we are. My neighbor Linda cornered me at the mailbox last week asking for it, so I figured I might as well share it with everyone.
Now, here’s the thing about this salted caramel apple pie cheesecake—it’s basically three desserts having a party in one pan. And yes, it sounds complicated, but if I can make it without crying (much), you definitely can too.
Table of Contents
How I Accidentally Created This Monster
I didn’t invent this recipe. Let’s be clear. I think I saw something similar on Pinterest back in 2019? Or maybe it was a cooking show? Honestly can’t remember. What I DO remember is trying to make a regular apple pie for Thanksgiving and completely botching the crust. Like, it was a disaster. Complete disaster.
So I had all these cinnamon apples just sitting there, and a cheesecake in the fridge from another failed baking attempt (long story involving a broken springform pan). My sister was like, “Why don’t you just… combine them?” And I laughed because that sounded ridiculous.
But then I tried it.
And oh my god. EVERYONE at Thanksgiving ate three slices. My uncle Jerry, who literally never compliments anyone’s cooking, asked if I’d start a bakery. (I won’t, Jerry, but thanks.)
What Makes This Caramel Apple Cheesecake Different
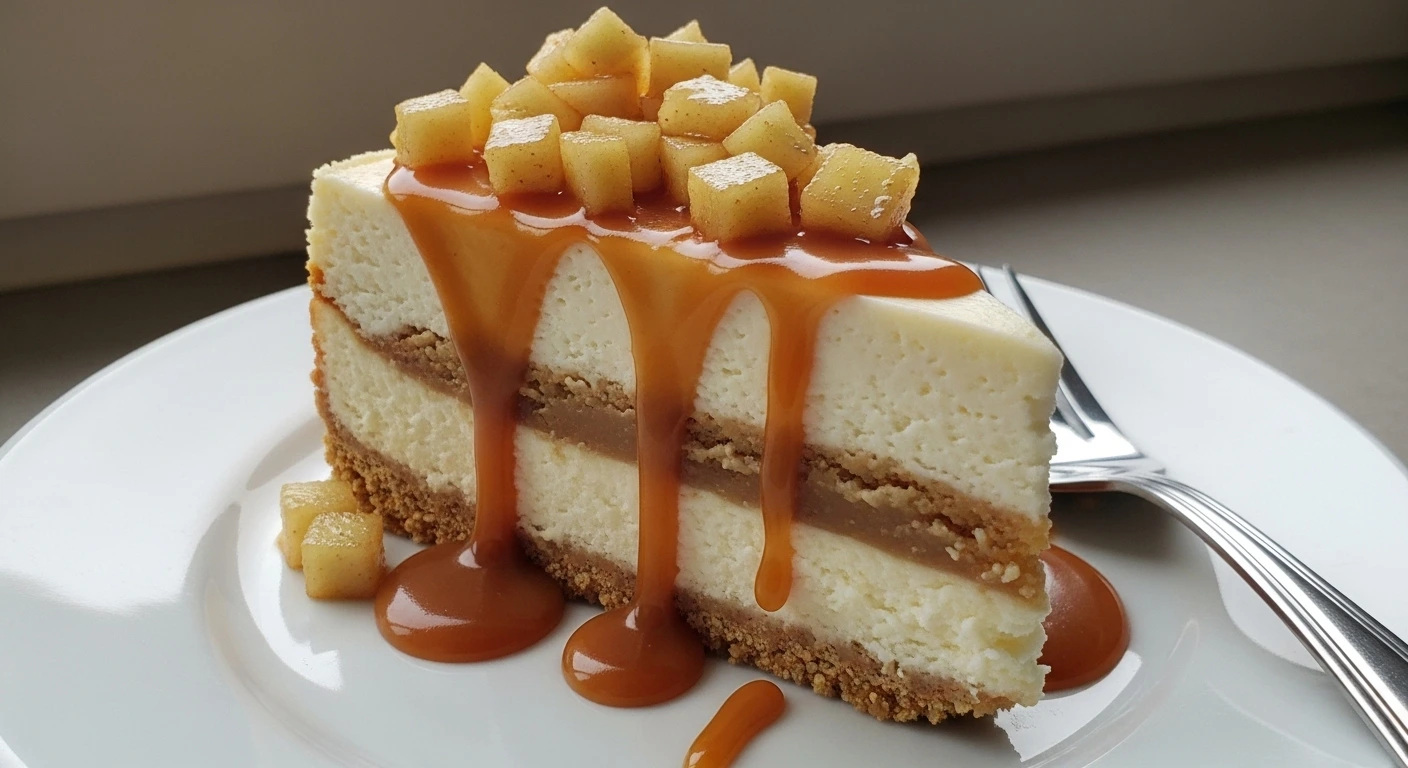
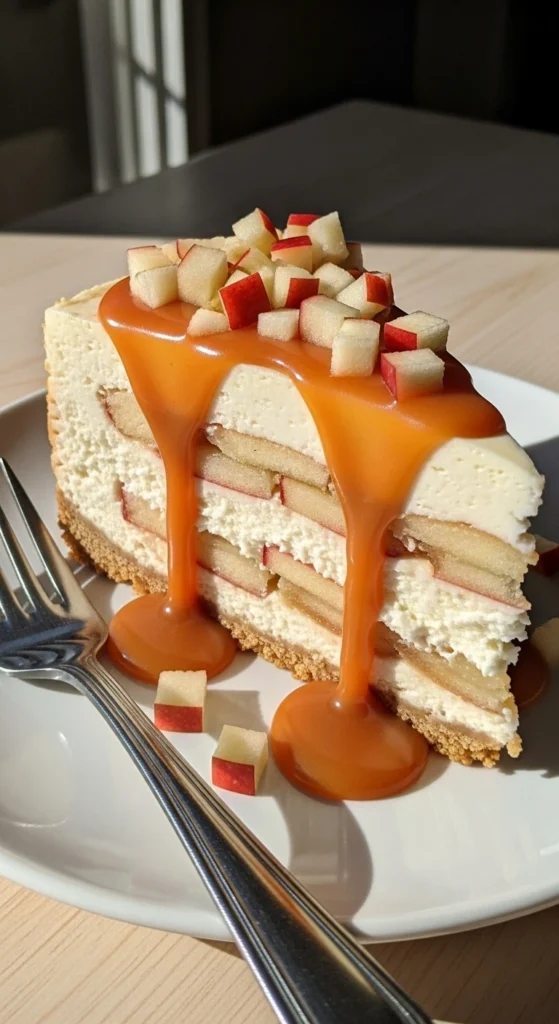
Look, I’ve tried a bunch of apple pie cheesecake recipes online. Some are just okay. Some are straight-up wrong about baking times. This version—my version—has a buttery graham cracker crust (because pie crust is overrated, fight me), a super creamy cheesecake layer, those amazing cinnamon-spiced apples on top, and then we drizzle the whole thing with salted caramel.
It’s essentially an apple crumble cheesecake recette meets traditional apple pie, but better. Way better.
Ingredients for Salted Caramel Apple Pie Cheesecake
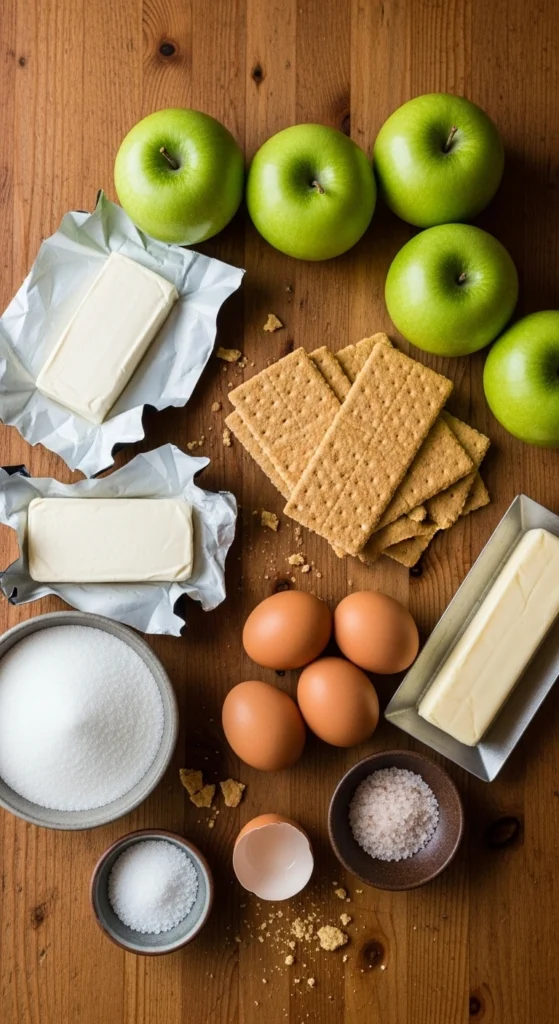
For the Crust:
- 2 cups graham cracker crumbs (about 16 crackers—I just buy the crumbs because crushing crackers makes a mess)
- 1/4 cup granulated sugar
- 1/2 cup melted butter (I use unsalted, but salted works too if that’s what you have)
For the Cheesecake Layer:
- 24 oz cream cheese, softened (THREE blocks—don’t skimp here. I use Philadelphia brand because that’s what Mom always used)
- 3/4 cup granulated sugar
- 3 large eggs (room temperature, though I forget this step half the time)
- 1 teaspoon vanilla extract
- 1/4 cup sour cream (makes it extra creamy, trust me on this one)
For the Apple Pie Filling:
- 4 medium Granny Smith apples, peeled and diced (Granny Smiths are KEY. Don’t use Red Delicious unless you hate yourself)
- 1/4 cup brown sugar
- 2 tablespoons butter
- 1 teaspoon cinnamon
- 1/4 teaspoon nutmeg
- 1 tablespoon cornstarch
- 2 tablespoons water
For the Salted Caramel:
- 1 cup granulated sugar
- 6 tablespoons butter, cubed
- 1/2 cup heavy cream
- 1 teaspoon sea salt (the flaky kind if you’re fancy)
Shopping tip: Good luck finding decent apples in July. I’ve learned to just make this during fall when apples are actually good. Also, don’t buy store-brand cream cheese. Just don’t. It’s watery and weird.
Making This Blue Bowl Apple Pie Cheesecake (Step-by-Step)
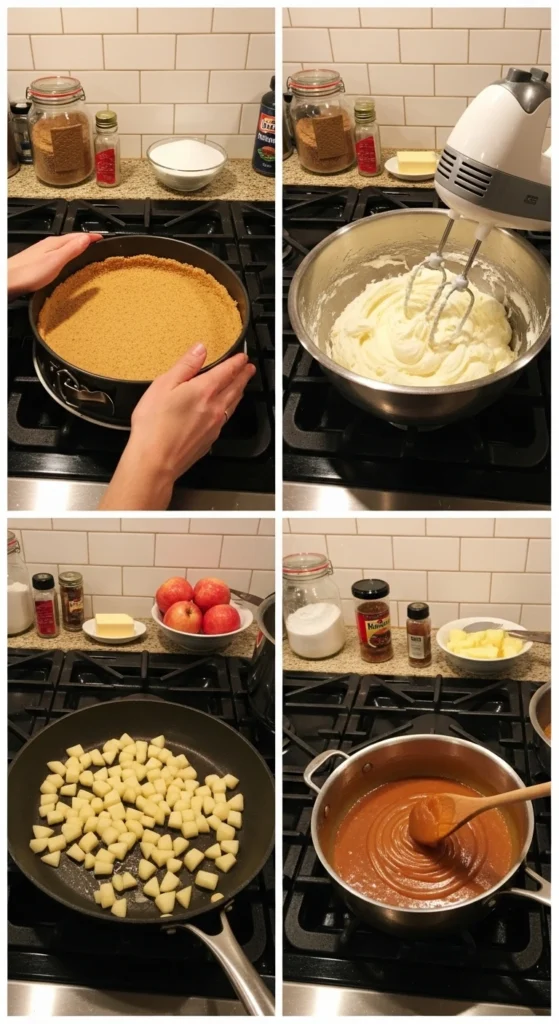
Step 1: The Crust (The Easy Part)
Preheat your oven to 325°F. Or 350°F then lower it. I always forget which temperature I actually use.
Mix graham cracker crumbs, sugar, and melted butter in a bowl until it looks like wet sand. Press this into the bottom of a 9-inch springform pan. Use the bottom of a glass to really pack it down—learned this from a YouTube video after my first crust fell apart.
Bake for 10 minutes. Set it aside to cool while you work on the cheesecake part.
(Oh wait, I forgot to mention—wrap the outside of your springform pan with aluminum foil. This prevents leaks if you’re doing a water bath. Which you should. But we’ll get to that.)
Step 2: The Cheesecake Filling (Don’t Overbeat!)
Let your cream cheese sit out for like 30 minutes before starting. Cold cream cheese is a nightmare to mix and you’ll end up with lumps. Been there, hated it.
Beat the cream cheese and sugar together until smooth. Like, really smooth. This takes about 3 minutes with an electric mixer. Don’t use a whisk for this. Trust me. Spoon doesn’t work either. Just use a mixer.
Add eggs ONE AT A TIME. This is important. I know it’s annoying. Do it anyway. Mix each egg until just combined, then add the next one.
Stir in vanilla and sour cream. The mixture should be smooth and creamy, not fluffy. If it’s fluffy, you overmixed it. Still works, but the texture is slightly different.
Pour this over your cooled crust.
Step 3: The Water Bath (Yes, Really)
Okay, so I’m gonna be honest… I skipped the water bath the first two times I made this. Both times, my cheesecake cracked like crazy. My sister called it “earthquake cheesecake.”
Here’s what you do: Place your wrapped springform pan inside a larger roasting pan. Pour hot water into the roasting pan until it comes about halfway up the sides of the springform pan.
Bake at 325°F for about 55-65 minutes. The center should still jiggle a little—like, it shouldn’t be liquid, but it shouldn’t be firm either. It’ll look weird and underdone. That’s normal.
Turn off the oven, crack the door open, and let the cheesecake cool inside for an hour. This prevents cracking. (Usually. Sometimes it cracks anyway because cheesecakes are dramatic.)
Then refrigerate for at least 4 hours, but honestly overnight is better.
Step 4: The Apple Pie Filling (My Favorite Part)
While the cheesecake is chilling, make your apple filling. I usually do this the next day because I’m lazy.
Peel and dice your apples. I cut them pretty small—like, 1/2 inch cubes? Maybe smaller? I’m bad at measuring.
Melt butter in a large skillet over medium heat. Add the apples, brown sugar, cinnamon, and nutmeg. Cook for about 8-10 minutes until the apples are soft but not mushy.
Mix cornstarch with water to make a slurry (fancy cooking word I learned from Food Network). Add this to the apples and cook for another 2 minutes until the mixture thickens.
Let this cool completely before putting it on your cheesecake. If you add warm apples to cold cheesecake, physics happens and it’s not pretty.
Step 5: The Salted Caramel (The Scary Part)
Making caramel from scratch stressed me out for YEARS. But honestly? It’s not that bad. You just have to watch it like a hawk.
Put sugar in a heavy-bottomed saucepan over medium heat. Don’t stir it—just swirl the pan occasionally. It’ll start clumping up and looking weird. Keep going. It’ll melt into a beautiful amber liquid. This takes about 8-10 minutes.
Once it’s all melted and amber-colored (not dark brown—that’s burned), add the butter. It’ll bubble like crazy. Stir it in.
Remove from heat and slowly pour in the heavy cream while stirring constantly. It’ll bubble again. Keep stirring until smooth.
Stir in the sea salt. Taste it. Add more salt if you want. I usually do because I’m obsessed with salted caramel.
Let this cool for about 15 minutes before using it. It’ll thicken as it cools.
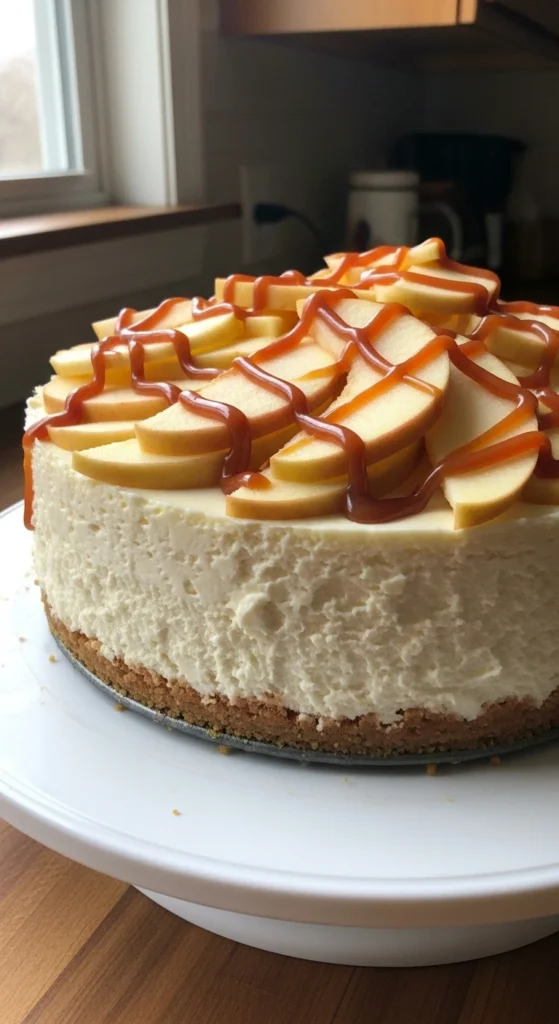
Step 6: Assembly (The Fun Part!)
Remove your cheesecake from the pan. Run a knife around the edges first, then carefully release the springform.
Spoon the cooled apple mixture on top of the cheesecake. Spread it evenly but don’t stress if it’s not perfect. It’s rustic. That’s trendy now.
Drizzle the salted caramel over everything. I use a spoon and just drizzle it back and forth. Some people use a squeeze bottle. I’m not that fancy.
Sprinkle a little extra sea salt on top if you want. I always do.
Tips from Someone Who’s Made This Way Too Many Times
About the apples: I’ve tried this with Honeycrisp, Gala, and even those weird Pink Lady apples. Granny Smith is still the best because they don’t get too mushy and the tartness balances the sweetness. But use what you have.
The cheesecake is too soft: You probably underbaked it. It should jiggle slightly in the center but not be liquid. If it’s too soft after refrigerating, pop it in the freezer for 30 minutes before serving.
Can you make this ahead? YES. This is actually better the next day. The flavors have time to hang out and become friends. I’ve made this three days ahead for parties with no issues.
My caramel crystallized: This happens when sugar gets on the sides of the pan. Use a wet pastry brush to wipe down the sides while making caramel. Or just start over. I’ve done that twice.
Serving size: This serves 12-14 people. But I’ve watched my husband eat a quarter of it in one sitting, so… your mileage may vary.
What My Family Thinks
My 10-year-old daughter picks off all the apples and just eats the cheesecake part. My son, who is seven, only wants the caramel. My husband eats everything and asks why I don’t make this every week. (Because it takes three hours, Brandon.)
My mom said it reminds her of this apple pie inside cheesecake recipe she used to make in the 80s, but better because of the salted caramel. High praise from Mom, honestly.
Linda from next door made it for her book club and said everyone asked for the recipe. So now her whole book club is making it. I’ve created a monster.
Final Thoughts on This Salted Caramel Cheesecake Recipe
Look, I’m not saying this is the easiest dessert you’ll ever make. It’s got multiple components and takes some time. But it’s also not as hard as it looks, and the payoff is HUGE.
This is the dessert that makes people think you’re a way better baker than you actually are. It’s impressive without being fussy. And honestly? After making it four or five times, you’ll get into a rhythm and it becomes second nature.
Is it worth the effort? Ask the 23 people at my last potluck who scraped the serving dish clean and then stood around it hoping for more.
So yeah. Try it. Let me know how it goes. And if you burn the caramel, just make it again. I’ve been through six batches of burned caramel and I’m still here, still baking.
Happy baking! (And may your cheesecake not crack—but honestly, it’ll taste amazing either way.)