Okay, so I’m gonna be honest here—I messed up these Vampire Bite Halloween Cupcakes twice before I finally got them right. And by “messed up,” I mean the first batch looked more like roadkill than vampire bites. But hey, third time’s the charm, right?
Everyone keeps asking me for this recipe after I brought them to last year’s Halloween party, so here goes nothing. My neighbor’s kid literally said they were “scary good,” which I’m pretty sure was meant as a compliment. At least I hope so.
Table of Contents
The Story Behind These Vampire Bite Halloween Cupcakes
Look, I’m not gonna pretend I invented this concept. I think I saw something similar on Pinterest… or maybe it was Instagram? Honestly can’t remember anymore because let’s face it, we all just scroll mindlessly through food content at 2 AM, am I right?
What I can tell you is that I’ve been making these Vampire Bite Halloween Cupcakes for three years now, and they’ve become the thing people actually request. Not my famous chocolate chip cookies (which aren’t that famous, apparently), but these slightly creepy, definitely delicious cupcakes.
The whole vampire bite idea came to me when I was trying to figure out what to do with some leftover cherry pie filling. My 8-year-old refuses to eat anything that looks remotely healthy, but somehow loves these blood-red cupcakes. Kids are weird.
What Makes These Vampire Bite Halloween Cupcakes Special
Here’s the thing about these cupcakes—they look way more complicated than they actually are. The “bite marks” are just strategic thumb prints filled with cherry or strawberry filling. Genius? Maybe. Lazy? Definitely. But it works.
And the red velvet base? Chef’s kiss. I mean, it’s basically chocolate cake with red food coloring, but there’s something about that slight tang from the buttermilk that makes it perfect for this spooky theme.
Oh wait, I forgot to mention—you need to preheat your oven first. Like, seriously, don’t be like me and forget this step. I once put the cupcakes in a cold oven because I was distracted by a phone call, and they turned out flat as pancakes. Learn from my mistakes, people.
Ingredients for Vampire Bite Halloween Cupcakes
Shopping tip: Good luck finding decent cream cheese this time of year—everyone’s buying it for pumpkin stuff. Stock up early.
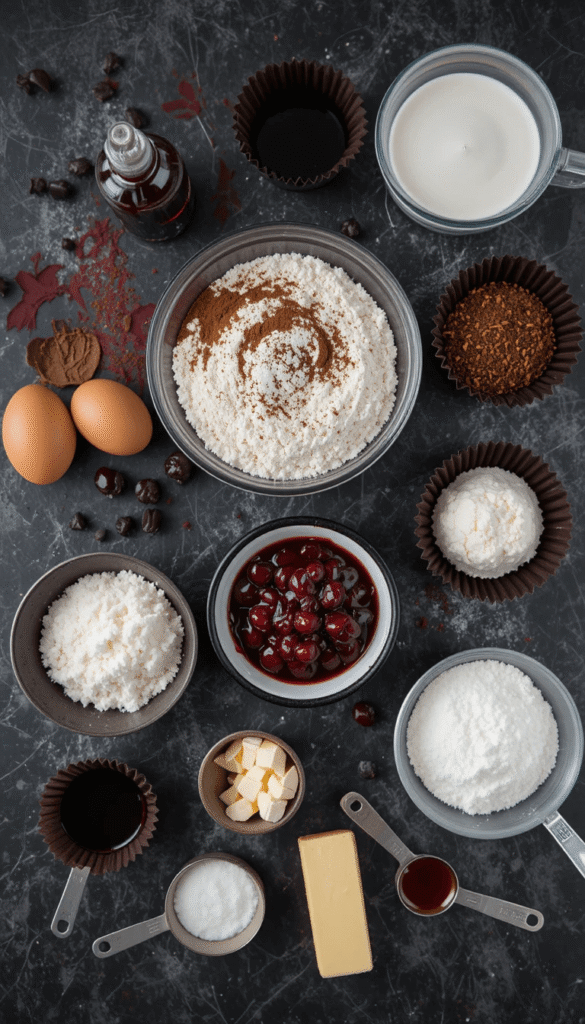
For the Cupcakes:
- 1 1/2 cups all-purpose flour (I use whatever’s cheapest at Walmart)
- 1 cup granulated sugar
- 1/4 cup cocoa powder (don’t use the expensive stuff, regular Hershey’s works fine)
- 1 teaspoon baking soda
- 1 teaspoon salt
- 1 cup warm water
- 1/3 cup vegetable oil
- 1 tablespoon white vinegar (this is important—don’t skip it!)
- 1 teaspoon vanilla extract
- Red food coloring (like, a LOT of red food coloring)
For the “Blood” Filling:
- 1/2 cup cherry pie filling OR strawberry jam (I prefer cherry because it looks more, you know, bloody)
- 2 tablespoons corn syrup (makes it glossy and gross-looking in a good way)
For the Cream Cheese Frosting:
- 8 oz cream cheese, softened (leave it out overnight or you’ll hate your life trying to mix it)
- 1/2 cup butter, softened
- 4 cups powdered sugar (yes, that’s a lot, but trust me)
- 1 teaspoon vanilla extract
- Pinch of salt
Instructions for Making Vampire Bite Halloween Cupcakes
Step 1: Make the Cupcakes
Preheat your oven to 350°F. I use paper liners in a regular muffin tin—makes cleanup so much easier, and honestly, who has time for greasing pans?
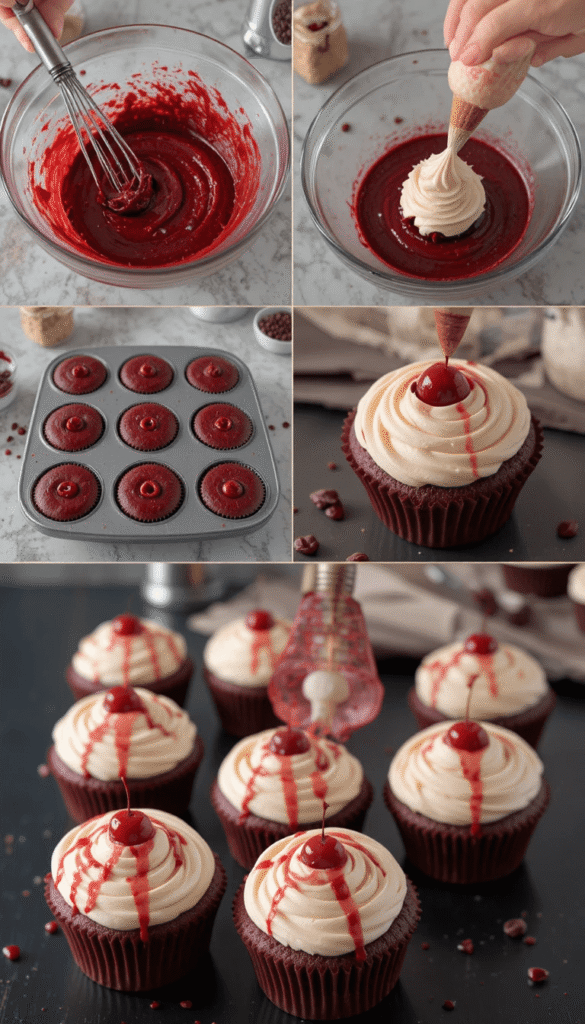
Mix all the dry ingredients in a large bowl. I just whisk them together with a fork because I’m lazy and it works just fine. In another bowl, whisk together the water, oil, vinegar, and vanilla. Then add enough red food coloring to make it look like something out of a horror movie. Seriously, don’t be shy with the coloring.
Pour the wet ingredients into the dry and stir until just combined. The batter will be thin—this is normal! Don’t panic like I did the first time. I thought I’d messed up and added more flour, which made them dense as hockey pucks.
Fill the cupcake liners about 2/3 full and bake for 18-20 minutes. Set a timer because I guarantee you’ll get distracted by something else and overcook them. Been there, done that, got the smoke alarm to prove it.
Step 2: Create the Vampire Bite Effect
This is where it gets fun (and messy). Once the cupcakes are completely cool—and I mean COMPLETELY cool, not just “eh, they’re probably fine”—use your thumb to press down in the center of each cupcake. Make it look like a bite mark with two distinct impressions.
Pro tip: Wash your hands first. I know it seems obvious, but you’d be surprised how many people forget this step.
Step 3: Prepare the “Blood”
Mix the cherry pie filling with corn syrup. If you’re using strawberry jam, you might want to chop up any big pieces first. The consistency should be thick but pourable. Kind of gross-looking, which is exactly what we want.
Step 4: Make the Frosting
Beat the cream cheese and butter together until fluffy. This takes longer than you think—like 3-4 minutes of actual beating. Then gradually add the powdered sugar, vanilla, and salt. Beat until it’s smooth and pipeable.
Actually, you know what? If you don’t have a stand mixer, just buy frosting from the store. Life’s too short to hand-whip four cups of powdered sugar. I won’t judge you. Much.
Step 5: Assembly (The Fun Part)
Fill the bite marks with the “blood” mixture using a small spoon. Don’t overfill—you want it to look like it’s pooling in the bite, not overflowing everywhere.
Pipe the cream cheese frosting around the edges of each cupcake, leaving the center bite marks exposed. I use a star tip because it looks more dramatic, but honestly, any tip works. Or just spread it with a knife if you’re feeling rebellious.
My Hard-Earned Tips for Perfect Vampire Bite Halloween Cupcakes
Timing is Everything
Make these the day you’re serving them, or at least the day before. The “blood” can make the cupcakes soggy if you wait too long. Learned this the hard way when I made them three days early for a party. They looked… sad.
Food Coloring Reality Check
Your hands will be red. Your counter will be red. Probably your clothes too. Wear something you don’t care about and have paper towels within arm’s reach at all times.
Storage
Keep them in the fridge because of the cream cheese frosting. But let them come to room temperature before serving—cold cupcakes are just sad cupcakes.
Kid-Friendly Modifications
If you’re serving these to little kids who might be freaked out by the whole vampire thing, just call them “Red Velvet Cupcakes with Cherry Centers.” Works every time.
What I Learned Making These Vampire Bite Halloween Cupcakes
First batch: Complete disaster. I used way too much food coloring and they tasted like chemicals. My husband took one bite and made a face that still haunts me.
Second batch: Better, but I forgot to let the cupcakes cool completely before adding the “blood,” so it just sank into the cake and disappeared. Still tasted good, but looked nothing like vampire bites.
Third batch: Finally got it right! The key is patience, which is not my strong suit, but apparently necessary for decent cupcakes.
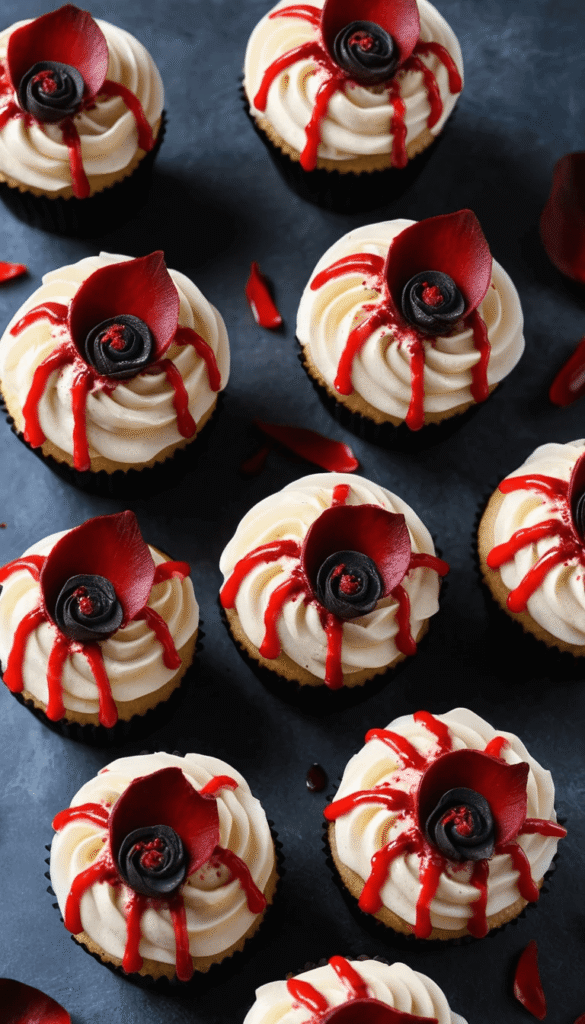
Serving These Spooky Treats
These Vampire Bite Halloween Cupcakes are perfect for Halloween parties, obviously. But I’ve also made them for vampire-themed movie nights and even brought them to a book club meeting when we were reading Dracula. They’re conversation starters, that’s for sure.
Pair them with some hot apple cider or coffee, and you’ve got the perfect fall treat. My mom always said presentation matters, and these definitely deliver on the drama factor.
Final Thoughts on Vampire Bite Halloween Cupcakes
Look, I’m not gonna lie—these aren’t the easiest cupcakes I’ve ever made. But they’re not the hardest either, and the payoff is totally worth it. The combination of the slightly tangy red velvet cake, creamy frosting, and that sweet “blood” center is just… chef’s kiss… perfect.
Plus, they photograph really well if you’re into that whole Instagram thing. Not that I post food pictures. Okay, fine, I totally post food pictures, but only when they turn out this good.
If I can make these without completely destroying my kitchen (well, mostly without destroying it), anyone can. Just remember: patience with the cooling, don’t be stingy with the red food coloring, and for the love of all that’s holy, set a timer.
Have you tried making these Vampire Bite Halloween Cupcakes? Let me know how yours turned out! And if you have any tricks for making them even spookier, I’m all ears. My Halloween game could always use more ammunition.
Happy baking, and may your smoke alarms stay quiet! 🧛♀️
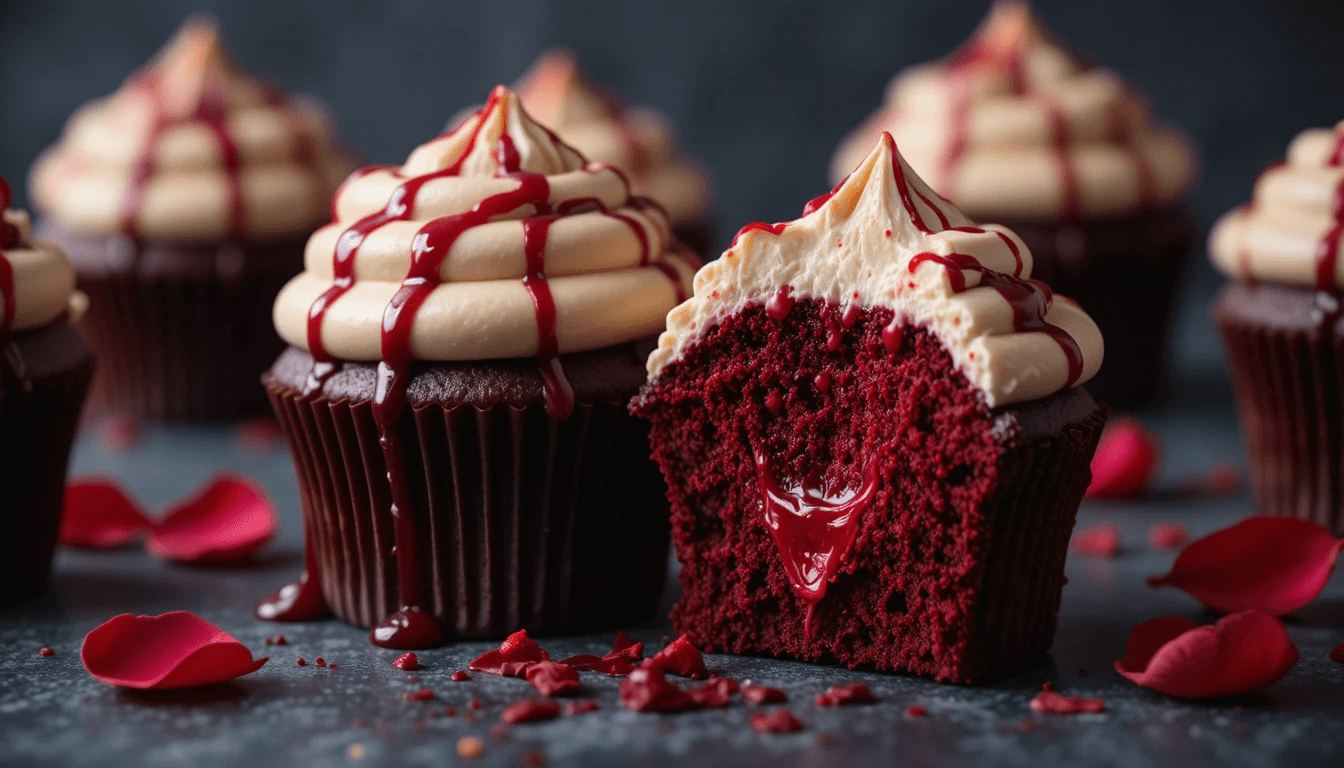
Vampire Bite Halloween Cupcakes: A Spooky Delight with a Deliciously Sinister Twist
These spooky Vampire Bite Halloween Cupcakes feature red velvet cake with cherry 'blood' filling and cream cheese frosting. Perfect for Halloween parties with realistic bite mark impressions that look hauntingly delicious.
Ingredients
- 1 1/2 cups all-purpose flour
- 1 cup granulated sugar
- 1/4 cup cocoa powder
- 1 teaspoon baking soda
- 1 teaspoon salt
- 1 cup warm water
- 1/3 cup vegetable oil
- 1 tablespoon white vinegar
- 1 teaspoon vanilla extract
- Red food coloring
- 1/2 cup cherry pie filling
- 2 tablespoons corn syrup
- 8 oz cream cheese, softened
- 1/2 cup butter, softened
- 4 cups powdered sugar
- 1 teaspoon vanilla extract
- Pinch of salt
Instructions
-
Step 1Preheat oven to 350°F. Line a muffin tin with paper cupcake liners.
-
Step 2In a large bowl, whisk together flour, sugar, cocoa powder, baking soda, and salt.
-
Step 3In another bowl, whisk together warm water, oil, vinegar, vanilla, and enough red food coloring to achieve deep red color.
-
Step 4Pour wet ingredients into dry ingredients and stir until just combined. Batter will be thin.
-
Step 5Fill cupcake liners 2/3 full with batter. Bake for 18-20 minutes until toothpick comes out clean.
-
Step 6Let cupcakes cool completely in pan, then transfer to wire rack.
-
Step 7Using your thumb, press down in center of each cooled cupcake to create vampire bite impression.
-
Step 8Mix cherry pie filling with corn syrup until thick but pourable consistency.
-
Step 9Beat cream cheese and butter until fluffy. Gradually add powdered sugar, vanilla, and salt until smooth.
-
Step 10Spoon cherry mixture into the thumb impressions, filling each bite mark.
-
Step 11Pipe cream cheese frosting around edges of cupcakes, leaving bite marks exposed.
-
Step 12Refrigerate until ready to serve. Let come to room temperature before serving for best texture.